How to Set up Github Personal Access Token

In this article, Let's learn how to set up GitHub personal access token. Github has officially announced - Support for password authentication was removed on August 13, 2021. Please use a personal access token instead.
So you might get an error if you are using password authentication - "fatal: unable to access repo: The requested URL returned error: 403"
Set up Github Personal Access Token:
- Login to your Github account & Go to Settings.
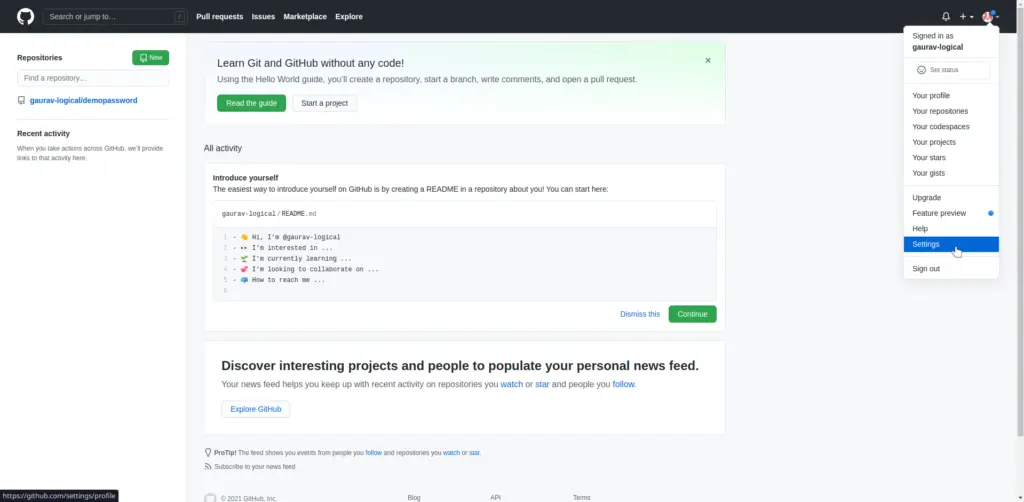
2. Go to Developer Settings Tab.
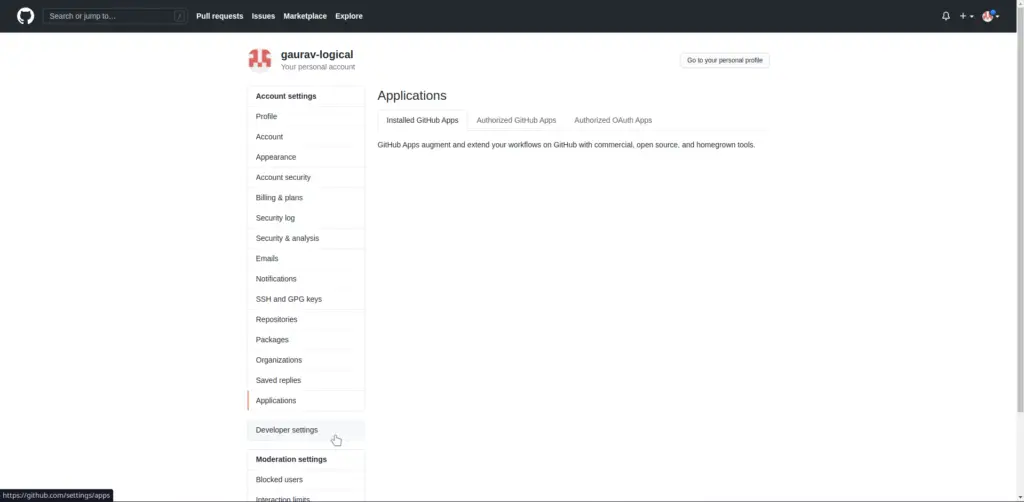
3. Click on Personal Access Token.
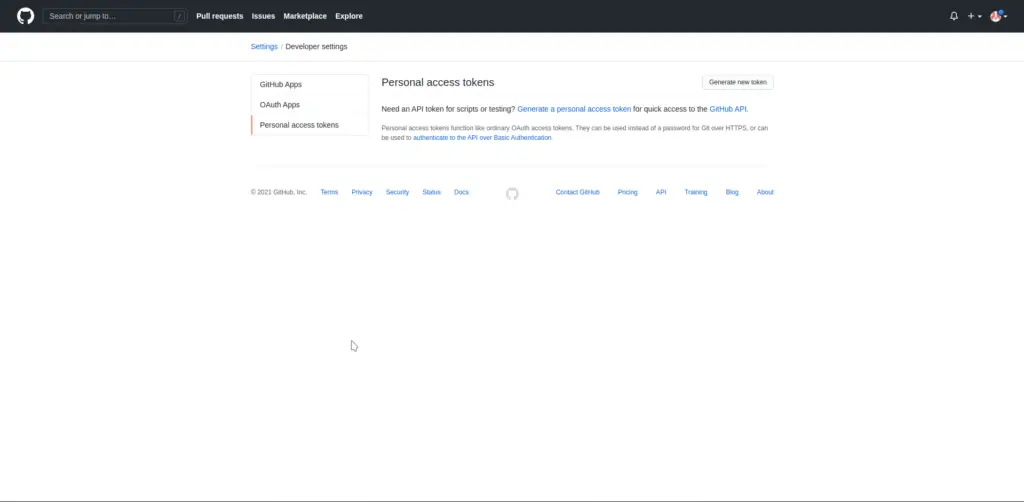
4. Generate a new token by clicking on the "Generate New Token" button, then you need to give a note of your token, Expiration Date & Scope of the token.
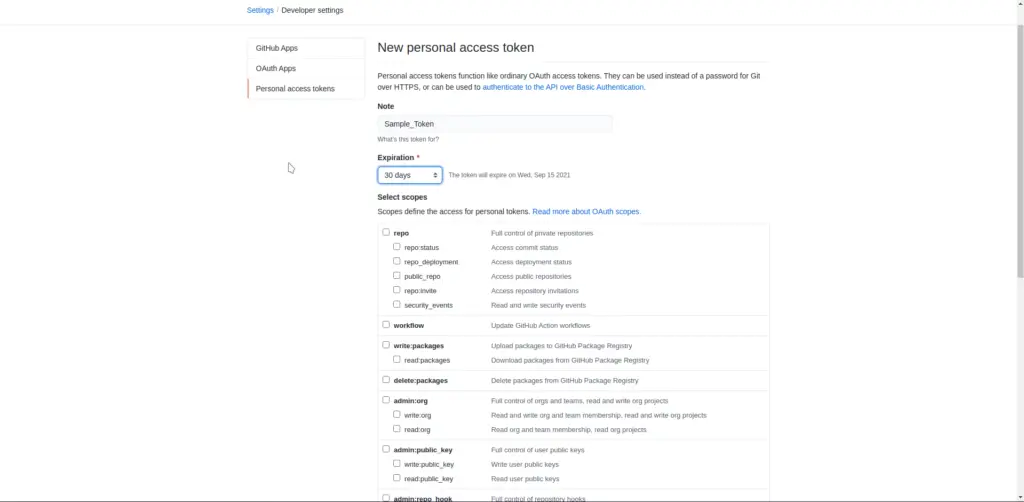
5. Click on Generate token button on the bottom, then your token will be finally generated. You can copy the same.
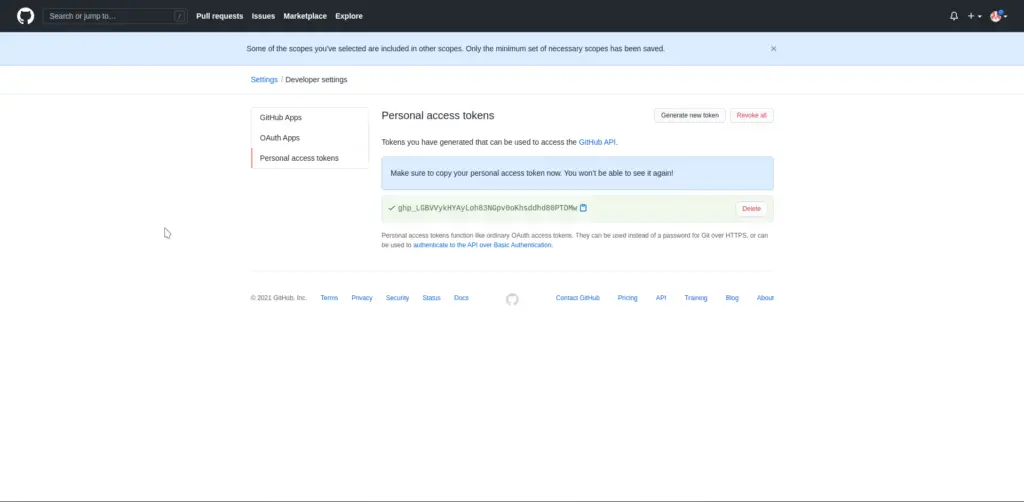
Now let's cover how to use this personal access token for the two scenarios, one is - if you have a new repository or the other one - if you have already cloned the old repository.
Use Personal Access Token on New Repository:
If you have a brand new repository that you have just cloned, you can simply push your changes by providing your password as a token in the prompt.
$ git clone https://github.com/username/repo.git
Username: enter_your_username
Password: enter_your_token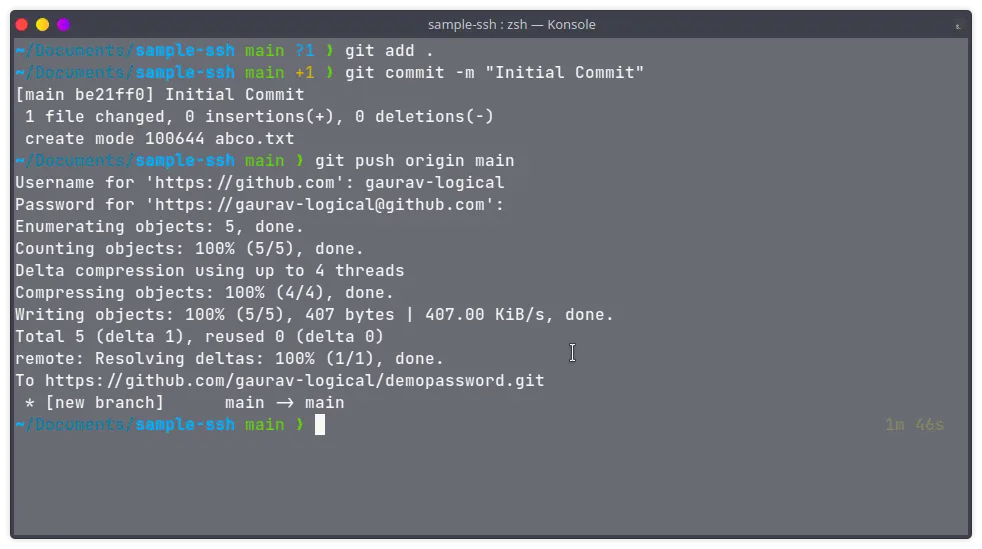
Use Personal Access Token on Existing Repository:
If you have an already cloned repository you can change the URL of the same by executing the below command.
git remote set-url origin https://YOUR_TOKEN@github.com/USERNAME/REPO.git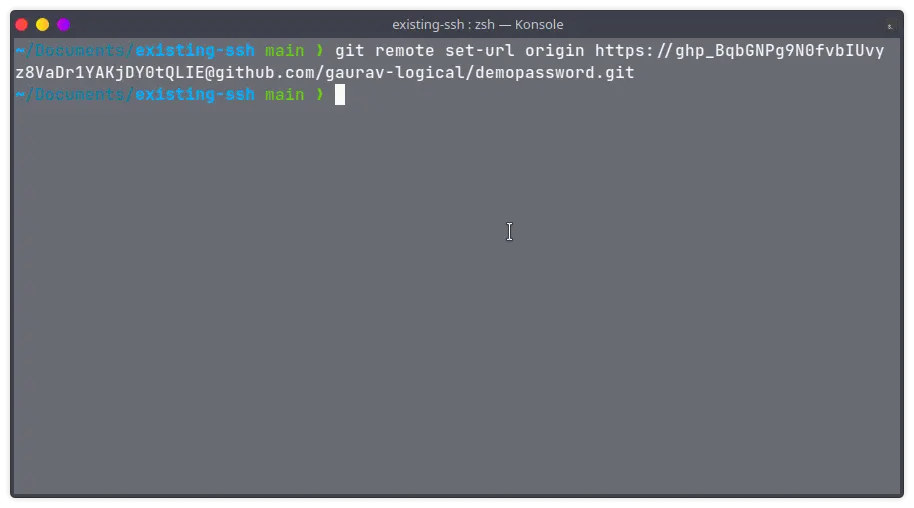
Now, you can easily commit your changes, please find the below screenshot for your reference.
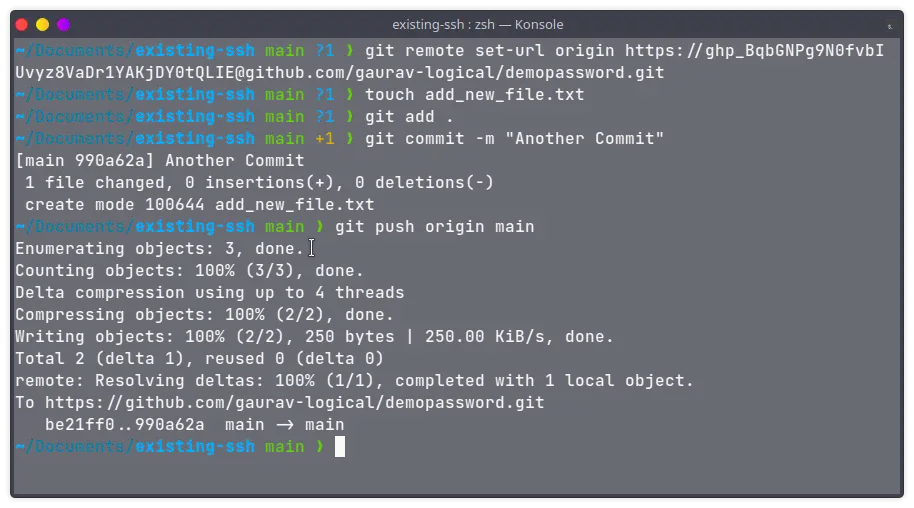
That's it for this article, if you have any queries or suggestions please write them down in the comment section below.
Leave a Comment

Popular Posts


