
4 Easy Steps to Patch an NPM Package
Learn how to quickly fix bugs in your dependencies by patching NPM packages directly.
Gaurav Bhardwaj
NPM is one of the great package managers of the JavaScript runtime environment Node.js. With the npm, you can easily install packages that are available in the npm registry and also maintain your dependencies in a better way.
There can be many scenarios where you encounter a bug in any package. As a possible action, it is highly likely that you will report that bug in the Github repository of the package & wait for the fix.
Mostly the wait time is really long, you literally need to wait for the fix of the reported bug. This is understandable for the situations where you can actually wait for the fix.
If we consider today's "agile" approach then in most cases you have to fix that bug as soon as possible in order to fulfil the client's requirements. Clearly wait is not a desirable option in these cases.
There are many approaches where you can patch npm package. The easiest way is to do it by installing an npm package called "patch-package".
Patch npm package in simple 4 steps:
1. Installation of package
Install the patch-package package via NPM or Yarn by executing the below commands:
NPM
npm i patch-package
YARN
yarn add patch-package postinstall-postinstall
You can use --save-dev in case of NPM or --dev in case of YARN if you don't need to run npm in production, e.g. if you're making a web frontend.
2. Adding postinstall script in your package.json file.
Since we have installed patch-package now we need to add a postinstall script in the package.json file as below.
 "scripts": {
"postinstall": "patch-package"
}
You can refer to the package documentation if you have a question in your mind - Why are we using postinstall-postinstall
3. Alter the code of the package & Create a patch file.
After executing the previous steps, You can change the code of the desired package inside the node_modules directory.
As a next step, you need to create a patch file by executing the below command:
NPM:
npx patch-package <package_name>
YARN
yarn patch-package <package_name>
This will create a patch file inside the patches directory. For better tracking you can commit this patch to your github repository by executing the following command.
git add .
git commit -m "Created a patch for bug related to Next.js Module"
git push origin <remote>
4. Final Steps
Woho! You have created your first patch of an NPM Package. Now as the part of last step, you need to apply your fix to the package manager by executing the below command.
npm install or yarn install
DEMO
As part of our demo, Let's add a code in Next.js library. We will create a demo next project:
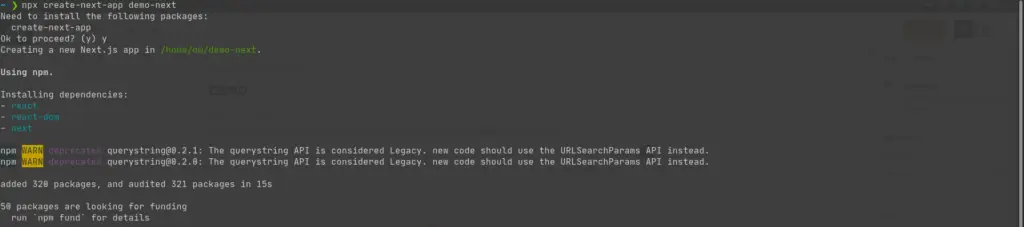
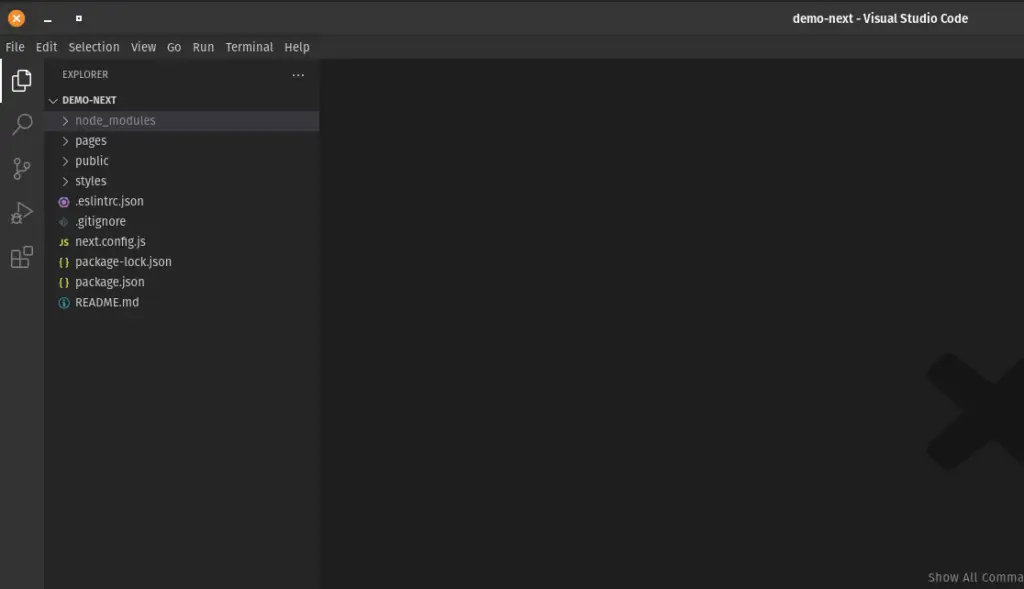
We will open the same in an editor - visual studio code.
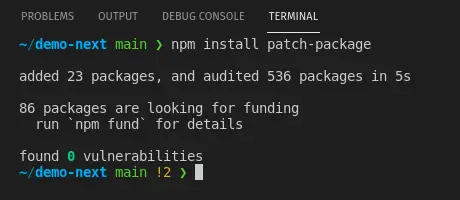
As we have learned in this article, we will install the package patch-package
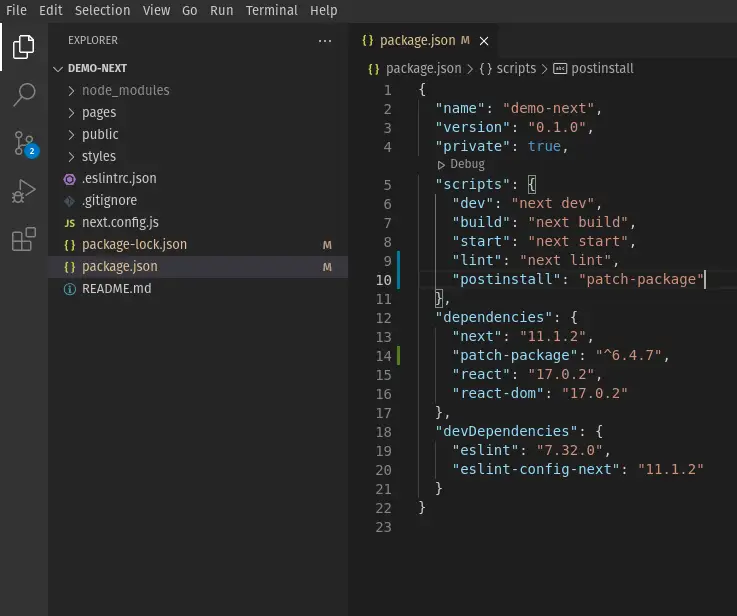
We will now add the postinstall in the script section of package.json file.
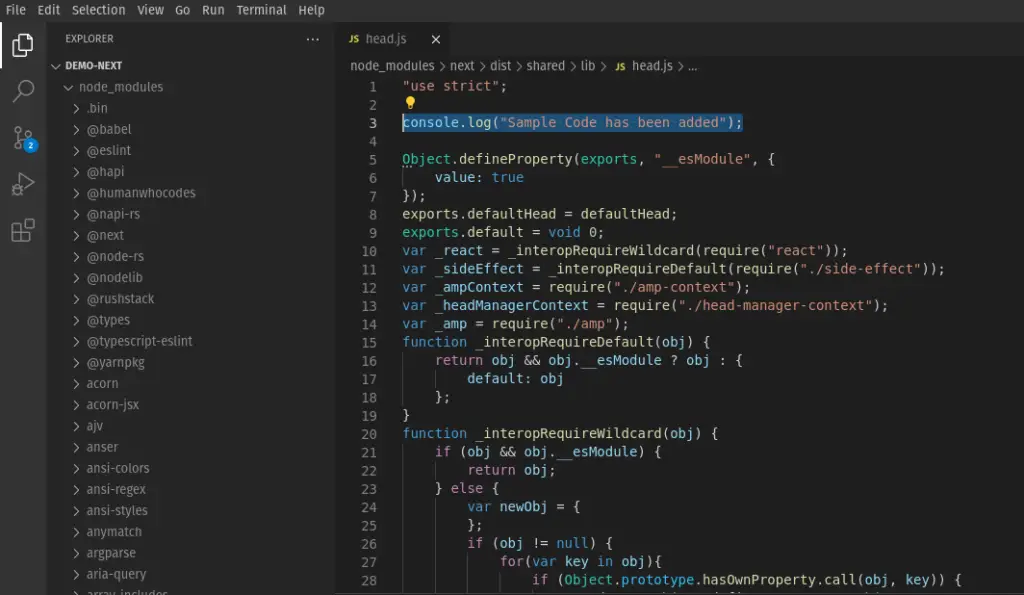
Let's add some code to any next package file node_modules directory.
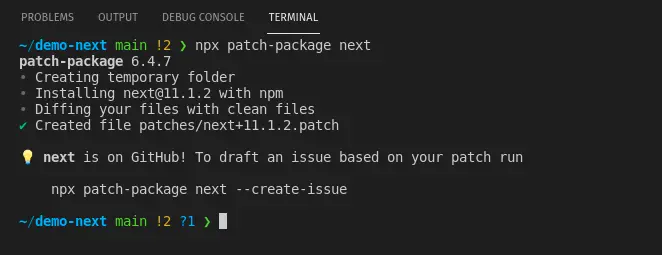
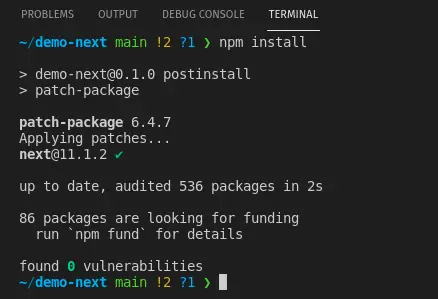
We will now create a patch for this change, by executing the command shown in the screenshot below.
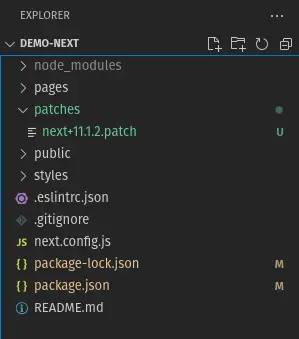
If you will notice your project folder structure, a new directory patches has been added.
As a final step, lets execute the npm install for applying patch.
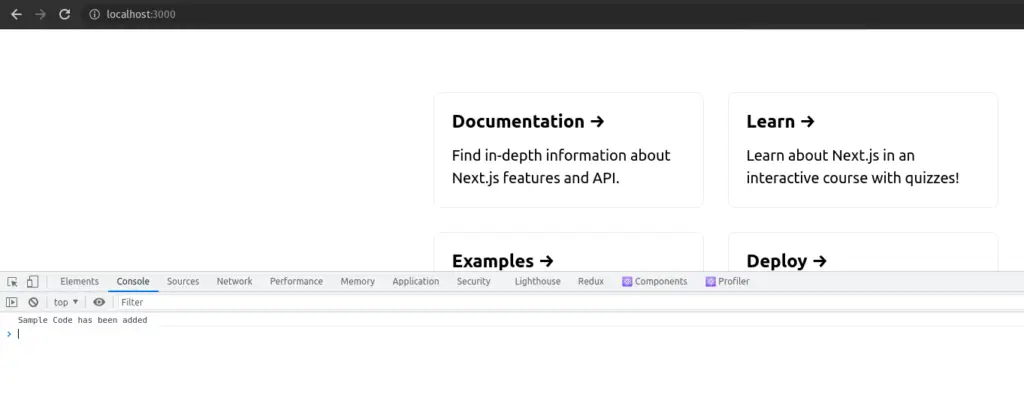
Now we will run the application & test our patch :)
If you have any question, feel free to post in comment section below.
Gaurav Bhardwaj
Bridging the gap between cutting-edge AI and foundational technology. As an Engineer and AI Architect, I translate complex concepts across Generative AI, Agentic systems, and Full-stack Engineering into clear, actionable insights—all anchored by deep expertise in Linux, SEO, and systems design.